
Introduction
Early striking—the removal of formwork and scaffolding before concrete reaches full design strength—can accelerate schedules and cut costs. But without a sound reshoring plan and proper understanding of load paths, the practice is a gamble. This article distills five in-depth lectures into a single guide: from fundamental principles to stiffness-based load transfer calculations.
Full videos: https://www.youtube.com/playlist?list=PLmvAzlH02b_WXd-ODOFNDjVVwovdCasgt
1. Fundamental Principles of Early Striking
Formwork and scaffolding are not just temporary; they are an integral load-bearing system during construction. When you remove them early, the fresh slab must carry part of its own weight plus any redistributed loads. Reshoring ensures the load path remains continuous down to lower levels.
2. Choosing the Right Execution Strategy
From the second lecture, a key takeaway emerges: no single striking method fits all projects. Contractors must weigh:
-
Concrete mix design and strength gain curve
-
Floor spans and thickness
-
Availability of formwork sets
-
Project schedule pressures
Comparative examples showed that conservative striking ensures safety but locks resources, while aggressive striking can shorten cycles if supported by strong reshoring and accurate monitoring.
3. Risk vs Breakthrough: How Far Can You Push?
In lecture three, the tone shifts to the central debate: reckless gamble or strategic breakthrough?
-
Reckless if strength tests are ignored and reshoring is insufficient.
-
Breakthrough when engineers rely on real test data and enforce strict deflection monitoring.
The principle: Never strike earlier than your ability to measure, model, and back-prop safely.
4. Decoding Load Transfer Ratios in Shoring Systems
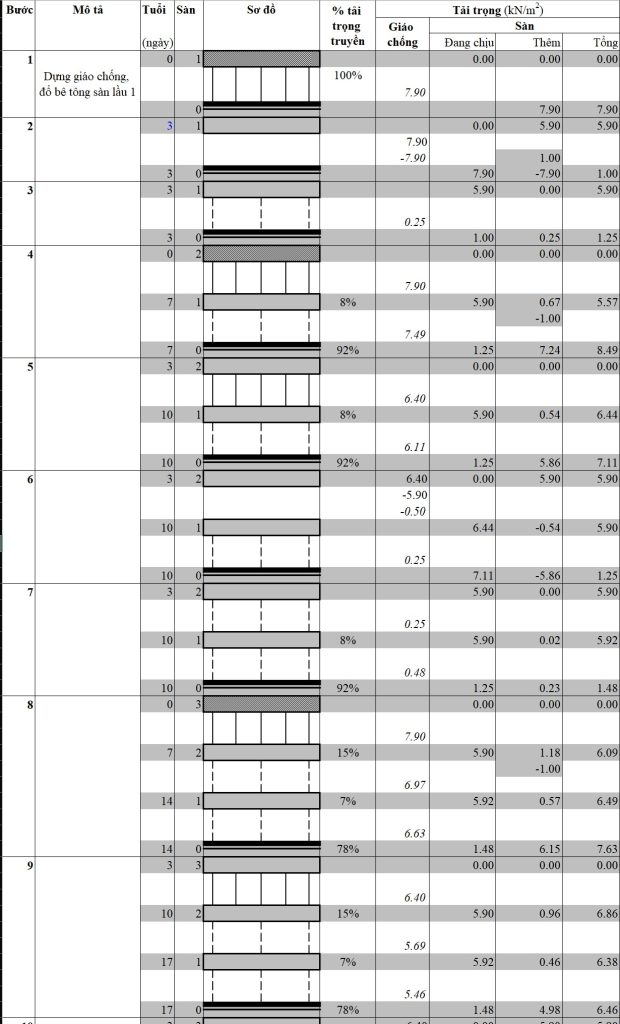
Lecture PL1 demystifies the infamous load transfer percentages between floors. The numbers are not arbitrary; they come from structural mechanics. By analyzing diagrams of multi-level scaffolding, we see that each floor absorbs a share depending on:
-
Position in the sequence
-
Relative stiffness of slab and props
-
Age-dependent strength of concrete
This explains why some codes specify conservative transfer factors—because real-world redistribution can surprise contractors.

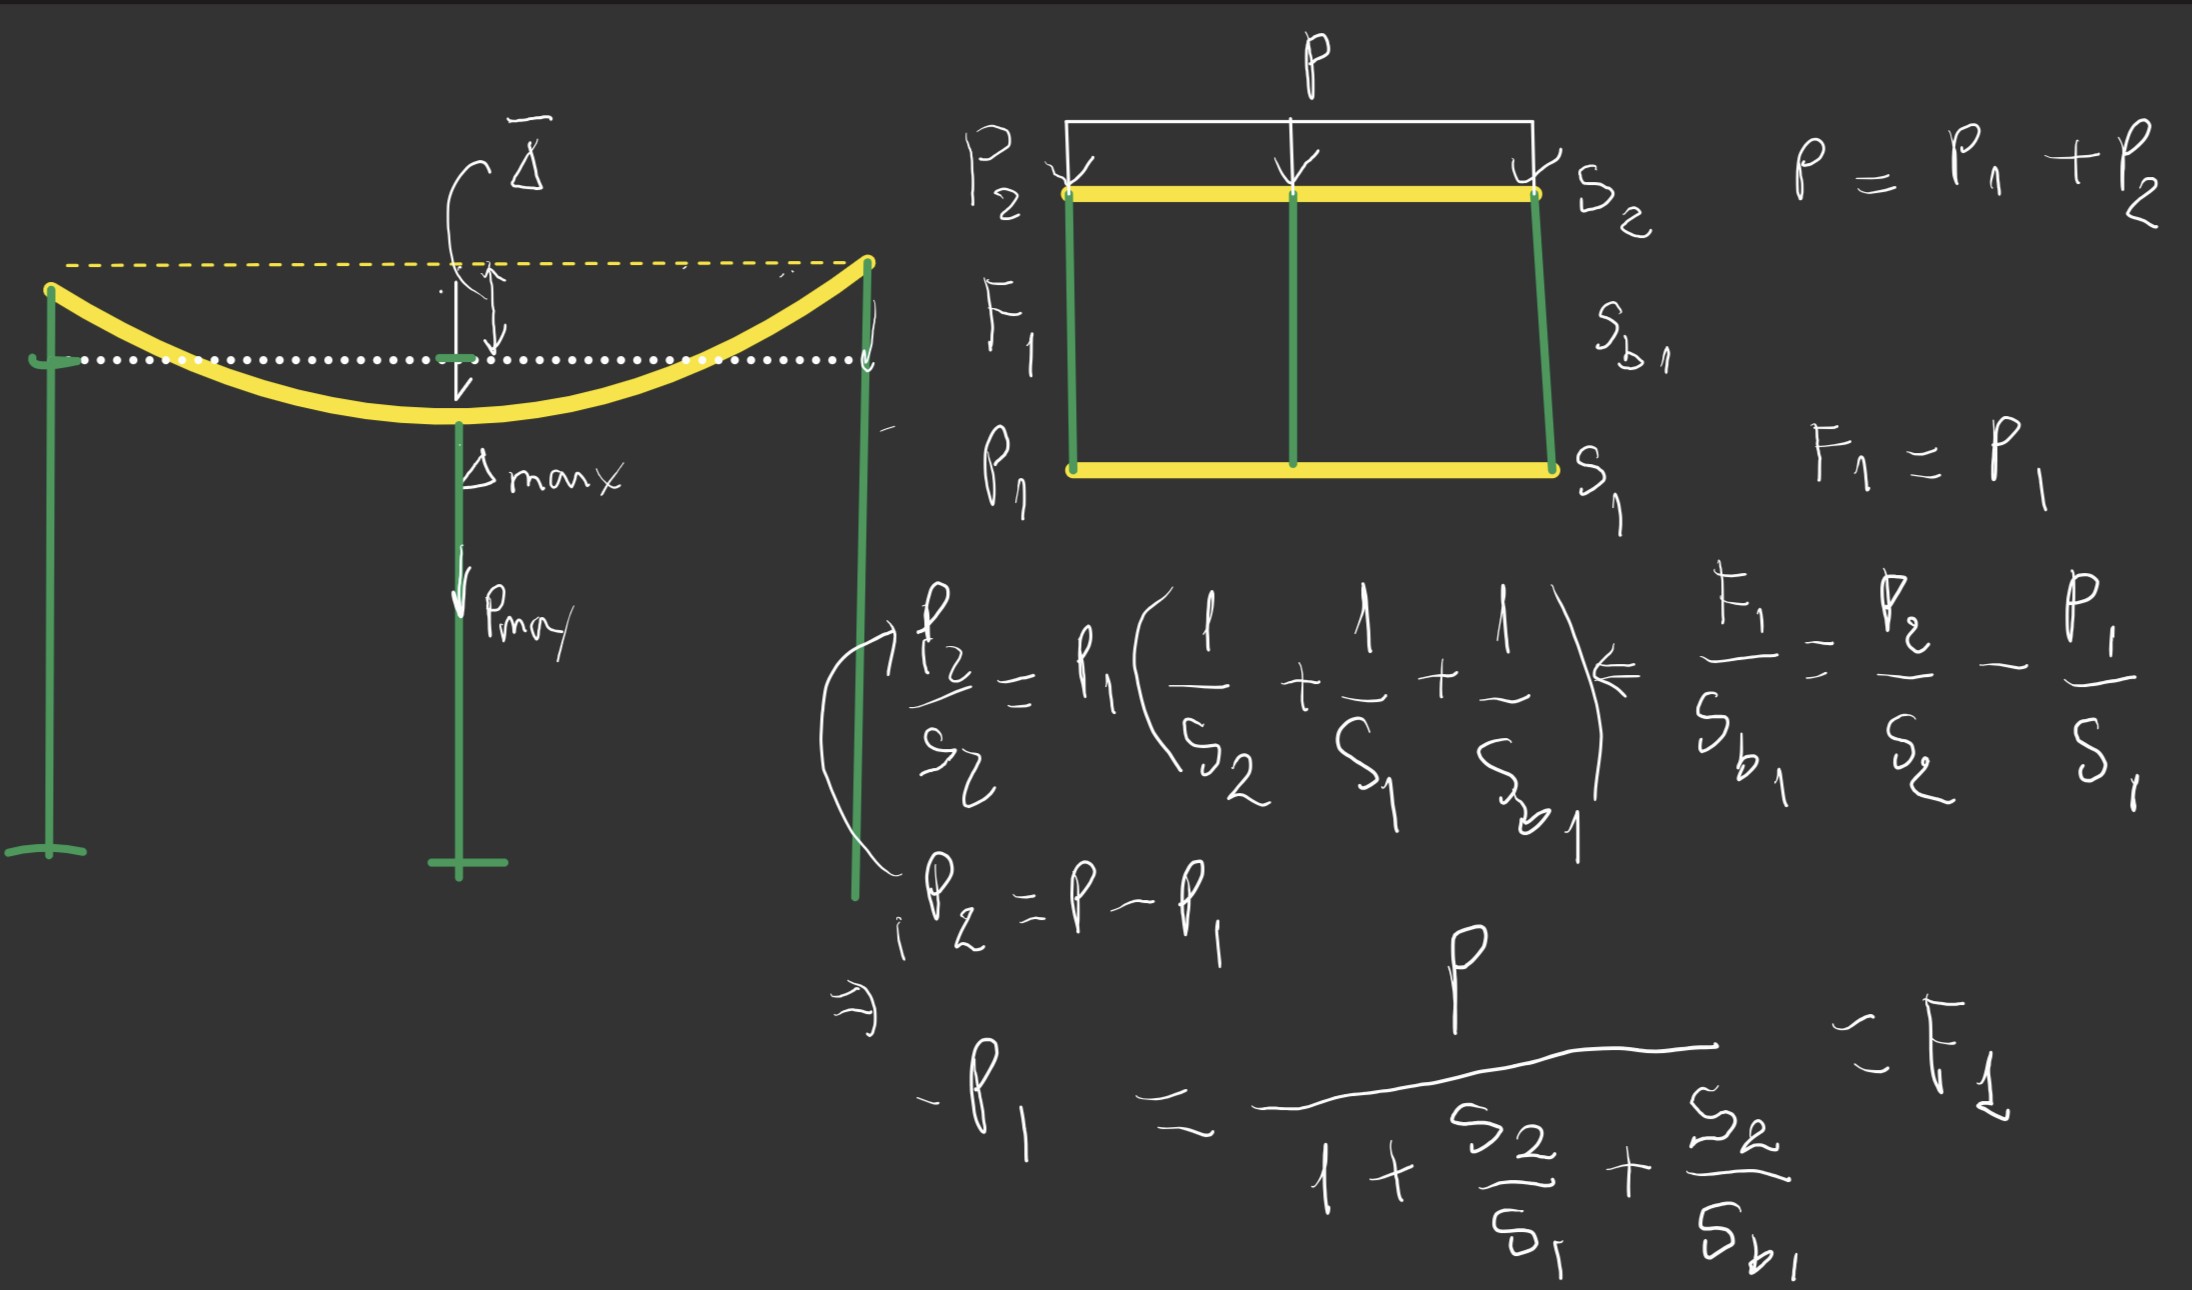
5. Stiffness-Based Approach to Load Distribution
Lecture PL2 goes further with equations. By assigning stiffness coefficients to slabs and props, engineers can calculate actual load distribution.
-
Floor stiffness increases as concrete cures.
-
Prop stiffness depends on material and spacing.
-
The equations balance these factors to give a realistic share of loads per level.
This analytical method allows more aggressive striking while still keeping safety margins intact.
6. Field Implementation and Monitoring
Theory only matters if enforced on site. Practical steps include:
-
Cube strength tests tied to pour dates
-
Survey points for deflection monitoring
-
Stage-by-stage striking permits
-
Daily briefing for foremen and crews
Deflection checks are vital. Target limits: span/480 for immediate deflection and span/240 for long-term. Exceeding these early often predicts serviceability issues down the line.

7. Site Checklist (Copy-Paste for Field Use)
Approved reshoring layout with spacing and bearing pads
Target strength defined and verified by test method
Survey benchmarks set and recorded
Permit issued per bay, not entire floor
Back-prop schedule aligned with pour sequence
Post-strike survey within 48 hours
8. Conclusion
Early striking and reshoring can save days per floor cycle in concrete frame projects. But they demand engineering rigor: load paths, stiffness-based calculations, and disciplined site control. Done right, it is not reckless—it is precision engineering applied to real-world construction.